This guide provides detailed instructions for configuring and managing your email settings within the WF: Request Quote, Hide Price app. Proper email configuration ensures efficient communication between your store and customers, especially for B2B quote requests, updates, and notifications
a. Admin Form Customization #
Customizing the Admin Form allows you to personalize the quote request form that customers fill out.
Steps for Admin Form Customization: #
- Navigate to the Admin Form Customization section in the app.
- Edit the fields of the form to include or exclude specific customer information (e.g., company name, custom requests).
- Save your changes to apply the customized form to your store’s quote requests.
This ensures that you gather relevant data, allowing for more precise responses and personalized quotes.
b. Admin Emails #
The Admin Emails section enables you to specify which email addresses will receive notifications about quote submissions. You can add multiple email addresses for different team members or departments.
Steps for Admin Emails Configuration: #
- In the Admin Emails section, enter multiple email addresses separated by commas (e.g., admin1@example.com, admin2@example.com).
- Save the changes to ensure that all quote notifications will be sent to the entered addresses.
You’ll receive email notifications whenever a customer submits a quote request, ensuring that your team is alerted promptly.
c. Upload Store Logo #
Adding a store logo to your email communications helps reinforce your brand identity and provides a more professional appearance. You can easily upload your store’s logo to be included in all emails sent from the app.
Steps to Upload Your Store Logo: #
- Go to the Upload Store’s Logo section.
- Click Upload File and select the logo file from your computer.
- Accepted formats: .jpeg, .jpg, or .png.
- The image size must be 1 MB or less.
- After selecting the file, click Add Logo to upload it.
Once uploaded, your logo will be included in all email communications, reinforcing your branding.
d. SMTP Form Configuration (Pro Plan) #
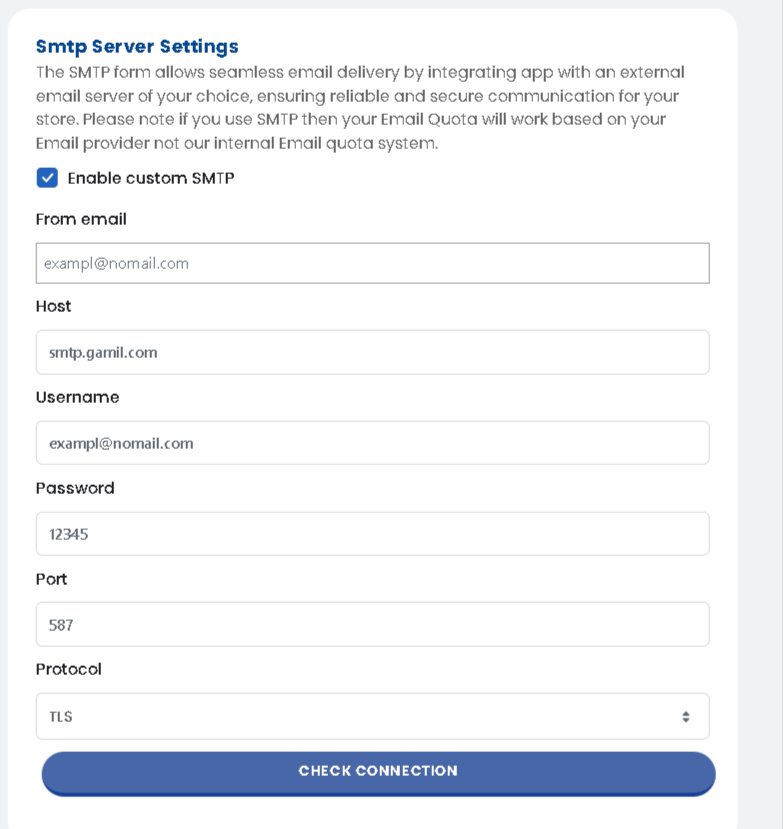
The SMTP Form Configuration feature allows you to integrate your store with an external email server for more reliable and secure email delivery. This feature is available to users on the Pro Plan and is essential for businesses that require consistent and high-quality email communication.
Steps for SMTP Configuration: #
- Navigate to the SMTP Form section (Pro Plan feature).
- Enter the following details:
- SMTP Server: The address of your email server
- User Email: Your email address used for sending emails.
- Password: The password associated with the email account or SMTP server.
- Port: The SMTP port number (e.g., 587 for TLS or 465 for SSL).
- Save your settings to enable the SMTP integration.
This integration ensures that your emails are delivered securely and efficiently, minimizing the risk of delivery issues.
e. Customize Your Email Template #
The Customize Your Email Template section allows you to modify the content, subject, and design of the emails that are sent to both admins and customers when a quote request is submitted.
Steps to Customize Your Email Template: #
- Go to the Customize Email Template section.
- You’ll see a list of email templates available:
- Admin Template: The email template sent to the admin when a quote request is made.
- User Template: The email template sent to the customer who requested the quote.
- Click Actions next to each template to modify the content.
- Change the email subject, body content, and styling as needed.
- Save your changes to apply the updated templates.
Customizing your email templates allows you to tailor the communication to your business’s tone and ensure the messaging aligns with your branding.